In the beginning, it’s certainly enough if you just let off steam in single-player mode. Then comes the interest in mini-game servers and afterward you want to make your own 1.20/1.20.1 server. At least that’s how it was for me. There are a thousand ways to do this. The biggest differences are the costs and the quality. I have also played on slow private servers, which were free, but you had to break down a block several times because it lagged so much. This should not happen to you and that’s why I show you how to make and host a Minecraft server. All instructions and tips are exclusively for Minecraft: Java Edition, which is only available on the computer.
First of all, a technical explanation is needed so that you understand what a Minecraft server is. A server is a link between the different players that are online in the same world. It stores, for example, your inventory, armor, and all other game progress. Hardware is the most important thing in this topic. You’ll also have to pay quite a bit for good quality technology. By way of illustration, the largest Minecraft server Hypixel has tens of thousands of US dollars in expenses every month, according to Wikipedia. Of course, the operators also earn a lot of money, but this also shows you that you can earn money with your own server. But you have to set one up before you can do that.
Buy a cheap Minecraft server
The best approach is to look for a hosting company that has fair prices. My choice fell on Apex because, in my opinion, they have the best price-performance ratio. Also, the setup is completed in less than five minutes, which is really impressive. The clear layout makes it not hard at all to make your own server.
Select RAM and player slots
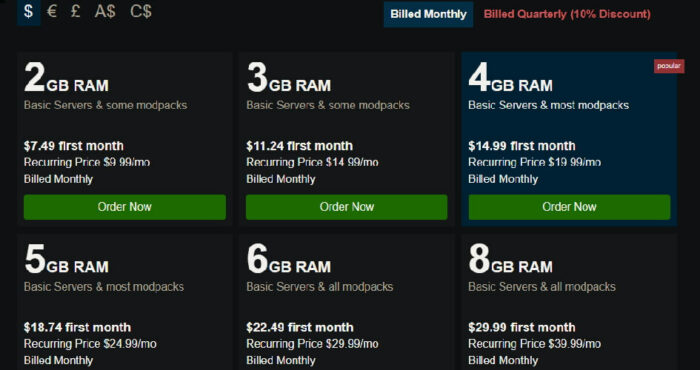
The most important thing is the RAM of your server. Apex already offers 2 GB RAM starting at about $7, which is cheap in comparison. If you have a lot of simultaneous players, you will need more of it, because otherwise there are often lags and the gaming fun suffers. 4 gigabytes are enough in most cases, but that’s hard to say in general. If the number of players is high and additional modpacks are installed, then you should definitely increase the RAM. It is also possible to make it a public server, where everyone can join. But that means you should choose the most powerful plan. You have to store a lot of plugins, mods, and user data. Many hosters also allow you to set the maximum number of players. This is another way of calculating prices, which is easy to understand, especially for beginners. For example, the hoster ScalaCube uses this. However, this type of calculation also has a big disadvantage and that is that you cannot have an unlimited number of players joining the server. This is okay for small projects, but personally, I would not let my slots be limited.
Small configurations
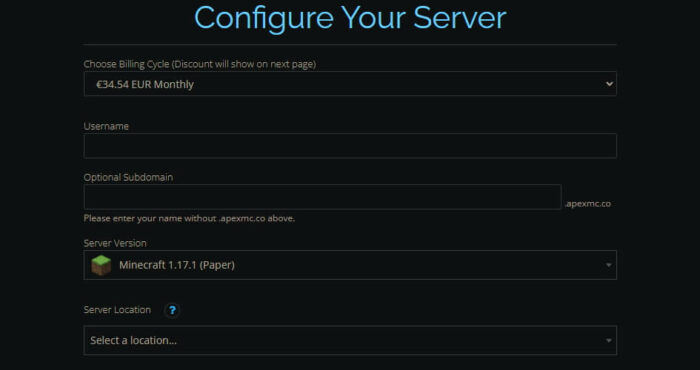
Now you make small configurations. First, you select the billing cycle. Monthly billing has the advantage that you can cancel at any time and no longer have to pay. But you can also pay quarterly and save money because you get a discount. You usually won’t stop playing Minecraft overnight, which is why I always choose the long-term option. After that, you enter your Minecraft username. In the box below you can choose the server address. Unfortunately, you can’t change the ending, but at least you can personalize the subdomain a bit. Popular names are usually already taken, but you will think of something.
Server version & location
Finally, it’s time to talk about Minecraft itself. You select the version of the game that you and your friends want to play in the “server version” section. The options are almost unlimited, which also makes the whole thing complicated. If you want to play on a normal vanilla server, you’ll logically choose the latest Minecraft version. In case of boredom, I have also installed large modpacks and spigot. Just scroll through. It’s virtually impossible that you won’t find what you’re looking for. You should choose a close server location to ensure short loading times. This way you will get the lowest ping.
Payment
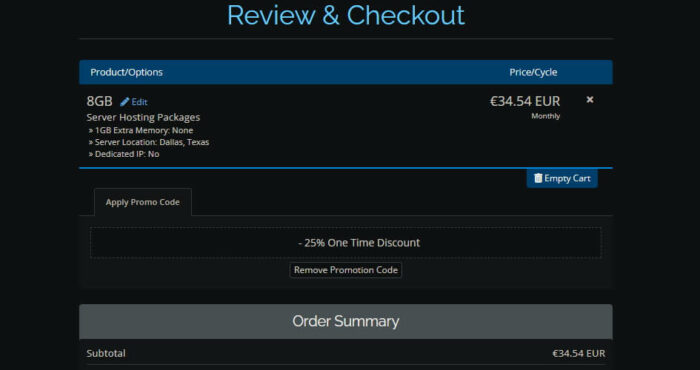
Optionally, you can purchase additional support. According to my experience, only the premium support is worth it here, which helps you really quickly with problems and the setup. However, I also know Minecraft very well, so the other services may make sense for you if you are a beginner. However, it is clear that every added service costs money. In the end, read through your selection carefully so that you notice any mistakes in time.
Normally, you get a 25% discount on your first order. This way you can get your own Minecraft server really cheap. You have to provide personal and billing information on the last page of the order process. Create your own customer account and select it. For example, your place of residence and your full name are required. Furthermore, you have the choice between PayPal and a credit card. It is difficult to get one of the two as a young person. Therefore, it is best to ask your parents or a friend. If you are already an adult, you can quickly set up a PayPal account if you don’t have one yet.
Everything worked when you received an order confirmation email. Now you have rented a DDOS-protected server that is always online and accessible. You can make changes and backups at any time via the server panel.
Create a free Minecraft server
Not everyone is willing to pay money for a Minecraft server and that’s why I’ll show you another way to play together with your friends. It is much more complicated and not as easy as paying money for it. However, it is not impossible.
Aternos
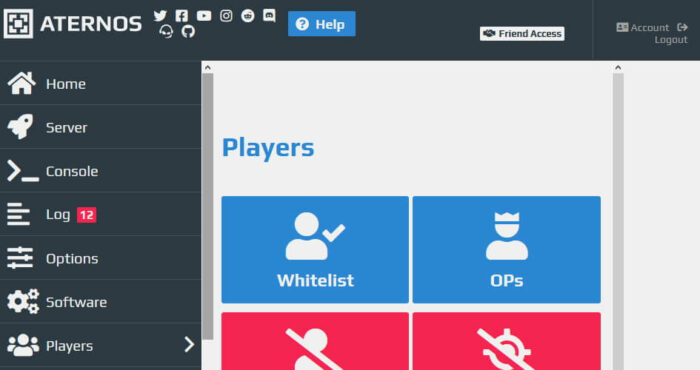
When I was younger, my friends and I mostly used Aternos. This project comes from a team of guys from Germany who have been offering free Minecraft servers since 2013. They finance themselves through advertising and are known all over the world. Their YouTube channel alone has over a hundred thousand subscribers and a million people play through their platform every day. They even started their own company as a result of the project. Accordingly, you don’t have to worry about whether Aternos is reputable.
You just need a user account and you have access to a lot of settings. The site comes very close to premium hosters because you can install many plugins and mods. By the way, you can choose between Java Edition and Bedrock Edition (MCPE). The server is created for free with just a few clicks and up to 20 players can join by default. Theoretically, this number can be increased infinitely, but in practice, this is not recommended, because otherwise there will be big lags. You can also set up your own server resource pack.
However, I must tell you that in 2015 Aternos was hacked. Sensitive user data was stolen and published on the internet as a result. I was also affected by this and can say from my own experience how annoying this is. Fortunately, there has been no other hack since then, for which the increased security standards are responsible. Nowadays you don’t need an email to register. Just a username and password.
Hamachi

An absolute classic is Hamachi. This software lets you create a private network with the help of remote computers. This service is limited to a few players. It’s not my personal favorite, but it’s an alternative solution if the previous options don’t work for you. Moreover, it is the perfect workaround if you play Minecraft cracked with Tlauncher.
Start downloading Hamachi from the developer’s site. Registration is required and note that all server users must register. Then install the program on your computer and log in. Go to the “network” tab and then to “create network”. Add anything to the server ID, e.g. the name of your best friend and a number. Set a password and you are ready to invite your game partners. Your friends need the network name and password to join. All players will appear in the network list after joining. Last but not least, you start Minecraft and everyone can play in your world.
Is it worth having your own server?
Now you have learned about the different methods of server creation. I think it’s always worth it to have your own server with friends because Minecraft is much more fun together. I also agree with paying for it, because you can also pool as a group. If you divide the monthly costs of 20$ by five people, for example, then it’s only 4$ for each person in the end.
Feel free to post a comment if you have any questions or tips on what’s missing in this article.


